How to Choose the Best Binder for Screen Printing?
Choosing the right Binder For Screen Printing starts with the fabric, not the product label. Cotton, polyester, and blended garments can respond differently to the same formulation. The binder affects adhesion, opacity, hand feel, flexibility, and wash durability. A soft print can look excellent on the press yet crack after washing. Small tests matter.
Industry research helps explain why selection deserves care. FESPA’s Global Print Census (2018) surveyed print businesses internationally and documented changing production priorities across the sector. Smithers’ market research, including The Future of Global Printing to 2028, provides broader context on print-market development. These reports do not rank binders or replace product testing. That distinction matters. Screen printers should use manufacturers’ technical data sheets for curing conditions, recommended dosage, compatible fabrics, and performance claims. Safety data sheets also support informed handling.
In practice, test a small run on the actual garment. Record the binder, pigment, mesh, print stroke, and curing settings. Then inspect the print after stretching and laundering. Check for cracking, color loss, stiffness, and poor adhesion. There is no universal winner. A binder that performs well on cotton may disappoint on polyester, and shop conditions can change results. That is easy to overlook. Compare samples under repeatable conditions, and confirm specifications with the supplier before scaling production.
What a Binder Does in Screen Printing
What a Binder Does in Screen Printing
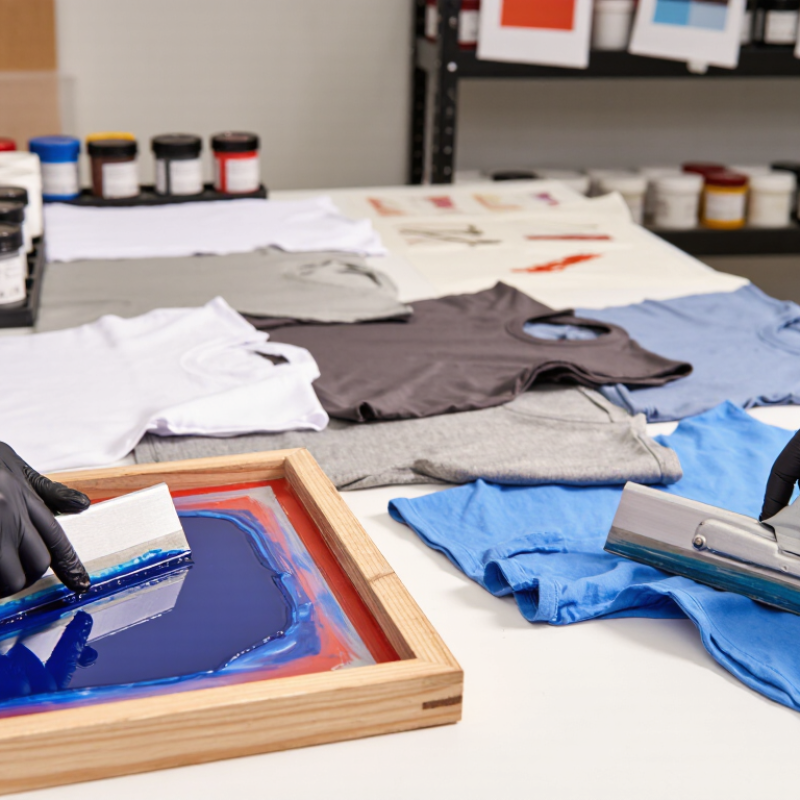
A binder is the film-forming ingredient that anchors pigment to fabric. Pigment itself does not dissolve into fibers like a dye; without enough binder, printed color can rub off or fade in washing. Too much can leave a stiff, plastic-like patch. The right balance depends on the fabric, print coverage, and desired hand feel. On a cotton tee, for example, a small test print can reveal whether the cured area stays soft when the shirt is stretched.
Binder choice matters as textile printing expands. Smithers’ report The Future of Digital Textile Printing to 2027 projected digital textile print volume to reach 5.5 billion square meters by 2027. That figure concerns digital printing, not screen printing, but it points to growing demand for durable printed textiles. In practice, binder alone does not guarantee durability: pigment load, mesh, deposit thickness, and curing temperature also affect results. AATCC Test Method 61 uses controlled laundering conditions to assess colorfastness; its results can help compare print samples, though they do not replace real-use testing.
Check the fabric’s care label and the binder’s technical data sheet before production. Cure a test swatch, then inspect its surface, stretch, and wash performance. I still treat the first sample as a starting point, not proof. Small errors in temperature or ink deposit can change the finish more than expected.
How Fabric Type and Ink System Affect Binder Choice
Fabric type sets the first constraint on binder choice. Cotton absorbs water-based pigment ink readily, while polyester resists wetting and can show poor adhesion or color migration. Blends are less predictable. Textile Exchange’s Materials Market Report 2024 estimates polyester made up 57% of global fiber production in 2023, compared with 20% for cotton. That mix matters on the print floor: a cotton-rich tee and a slick polyester jersey may need different binder levels, cure conditions, and wash tests. There is no universal setting.
Ink chemistry matters just as much. Water-based pigment systems rely on binder to anchor color to fibers; too little can cause fading or crocking, while too much may leave a stiff, plastic-like hand. Plastisol inks cure differently, so adding a separate textile binder is not automatically appropriate. Check the ink maker’s technical sheet, then test the actual fabric, mesh, and cure. A small sample can still mislead if the garment’s finish varies.
Tips: Print a swatch and record binder ratio, cure temperature, and dwell time. Compare hand feel and adhesion after laundering; AATCC TM61 offers a standardized accelerated laundering test for colorfastness. Don’t trust touch alone. Recheck blended lots—fiber percentages do not reveal every surface treatment.
Comparing Common Screen Printing Binder Types
Water-based acrylic binders suit many cotton and cotton-blend jobs. They can produce a soft print and clean detail, but drying on the screen may become a problem during slow runs. Polyurethane binders usually offer more stretch and abrasion resistance, making them useful for garments that move or get frequent wear. Silicone binders are highly elastic and often considered for performance fabrics. They can require careful handling and compatible curing conditions. Feel matters, too.
Tips: Match the binder to the fabric, not just the artwork. Check the supplier’s technical sheet for curing temperature and time. Print a small test, then stretch and wash it after curing. A print that looks good on the table may crack on a fitted sleeve.
There is no perfect binder for every job. Acrylic may be enough for a soft cotton shirt, while a stretchy synthetic can call for a more flexible system. Cost, print feel, equipment, and production speed all affect the choice. I would not rely on a single sample alone; fabric finishes and curing conditions can change the result. Compare a few test prints under the same settings before committing to a full run.
Key Performance Factors for Evaluating Binders
A binder should hold pigment firmly without making the print feel like a plastic patch. Check adhesion on the actual fabric, since cotton, polyester, and blends can respond differently. Stretch a cured sample gently. If fine cracks appear, the film may be too rigid for that garment. Softness matters, but not alone. A very soft print that fades after washing is not a strong choice. Compare samples after repeated wash cycles, and note changes in color, surface feel, and edge definition.
Curing performance deserves equal attention. Follow the binder’s specified time and temperature, then verify the fabric itself reaches the required conditions. A surface that feels dry may still be under-cured. Test small swatches before a production run; record the fabric, mesh, deposit, and cure settings so results can be repeated. Viscosity also affects print behavior: a binder that is too thick may leave uneven coverage, while one that is too thin can spread beyond fine details. One easy mistake is judging only the first fresh print. It looks convincing. Recheck samples after cooling and washing, and be willing to revise a test that seemed successful at first.
How to Choose the Best Binder for Screen Printing?
Key Performance Factors for Evaluating Binders
Suggested evaluation weights for comparing binders—not laboratory test results or universal specifications. Prioritize wash durability and adhesion, then adjust the weighting to suit the fabric, print design, and production process. Verify performance with product data sheets and print trials.
How to Test and Adjust a Binder Before Production
Before production, test the binder on the actual fabric, not just a similar swatch. Record the fabric lot, mesh count, squeegee pressure, and binder ratio; small changes can alter hand feel and coverage. Print a control sample alongside the adjusted one. Let both dry and cure according to the binder supplier’s technical instructions, then check for tackiness, cracking, and uneven edges. A neat wet print can still fail later.
Allow samples to cool fully before testing. Stretch the fabric gently in both directions and inspect the ink film under bright light. Then wash samples using the same settings each time. AATCC TM61-2013e(2020), a recognized accelerated laundering method, notes that one 45-minute test can approximate five typical home launderings, depending on test conditions. Use it as a controlled comparison, not a guarantee of identical customer washing results. Compare color loss, cracking, and fabric feel against the untreated control.
Adjust one variable at a time, such as binder percentage or curing conditions, and label every sample. Keep notes on mixing, print time, and wash results; memory is a poor production record. I still find this step easy to rush. Repeat the test on more than one fabric piece, since a single swatch may hide inconsistent deposition. Approve the version that balances adhesion, flexibility, and hand feel before running the full order.