
What Is Magnetic Track Lighting and How Does It Work?
Magnetic Track Lighting turns a ceiling rail into a flexible lighting system. Slim fixtures attach magnetically, then slide or reposition along a powered track. A narrow beam can highlight a kitchen counter; a softer pendant can warm the dining table. The appeal is practical: change the layout without relocating every ceiling connection. Still, magnetic does not mean universally compatible. Track voltage, drivers, and fixture standards must match.
The U.S. Department of Energy’s 2020 U.S. Lighting Market Characterization documents the broad shift toward LED lighting across American buildings. DOE’s Energy Saver guidance also notes that LEDs use up to 90% less energy than incandescent bulbs. Those figures describe LED technology, not magnetic tracks specifically—a distinction worth keeping clear. The track provides a flexible way to position compatible luminaires; efficiency depends on the light source and system design.
Architect Louis Kahn once observed, “The sun never knew how wonderful it was until it fell on the wall of a building.” His words offer a useful architectural lens, though they are not a statement about magnetic track products. A well-aimed fixture can bring texture out of a plaster wall or put crisp light on a work surface. Small changes matter. Yet a magnetic rail can look elegant in a showroom and feel wrong in a low, crowded room. This guide explains how Magnetic Track Lighting works, what its components do, and which installation details deserve a second look.
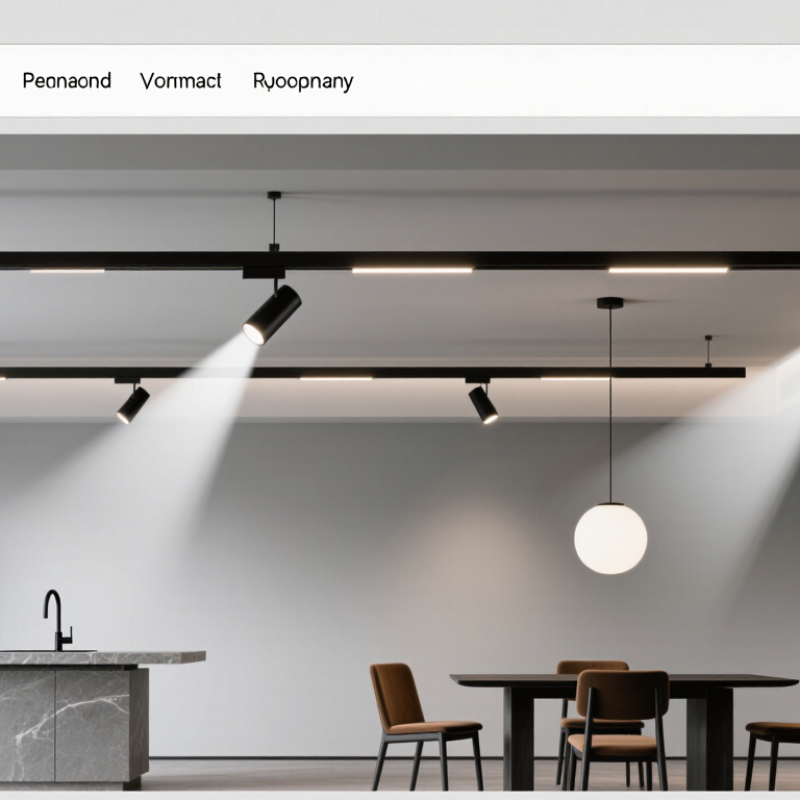
What Magnetic Track Lighting Is
Magnetic track lighting is a lighting system built around a narrow rail that carries electrical power and holds compatible light fixtures. Small magnetic modules, such as spotlights or linear lights, attach to the rail and make contact with its conductive surfaces. The magnet helps keep each module in place; it is not the power source. A suitable power supply converts household electricity to the low-voltage output required by the system.
The rail can be mounted on a ceiling, recessed into it, or suspended, depending on the room and product design. Fixtures can often be moved along the track or turned to aim light at a kitchen counter, artwork, or reading chair. Handy, but not magic. Modules and rails must be designed to work together, and the track’s electrical rating still matters. “Easy to reposition” also does not mean every fixture can be changed while the system is energized; follow the manufacturer’s instructions, and have a qualified electrician handle wiring. In a real room, the rail may look clean, but visible joints or poorly planned spacing can make the ceiling feel busy. That detail is easy to overlook.
What Is Magnetic Track Lighting and How Does It Work? — What Magnetic Track Lighting Is
| Dimension | What It Means | How It Works in Practice |
|---|---|---|
| Basic definition | A modular lighting system in which light fixtures attach to a track using magnetic force and connect to electrical contacts. | Fixtures can usually be moved or repositioned along a compatible track without rewiring each light. |
| Track | A linear housing that supports the fixtures and contains conductors that distribute electrical power. | Tracks are available in different system designs and may be surface-mounted, recessed, or suspended, depending on the product. |
| Magnetic attachment | Magnets help hold each compatible fixture in place on the track. | The magnetic connection supports installation and repositioning; electrical contacts on the fixture and track carry power. |
| Power supply | Many magnetic track systems use a driver to convert building mains electricity to the low-voltage output required by that system. | The driver must match the track’s specified input, output, and load requirements. Some system designs differ, so specifications should be checked before installation. |
| Electrical connection | Conductive contacts connect the fixture to the powered track. | Once a compatible fixture is correctly seated, the contacts complete the connection and supply power to its light source. |
| Fixture options | Depending on the system, fixtures may include spotlights, linear lights, or other module styles. | Different beam angles and fixture types can provide accent, task, or general illumination within one coordinated track layout. |
| Position and direction | Many fixtures can slide along the track, and some spotlights can be aimed. | Users can adjust light placement to suit a room layout, display, or work area, while following the fixture’s installation instructions. |
| Dimming | Dimming availability depends on the driver, fixtures, and control method used. | All components in the setup need to be compatible with the selected dimmer or control system. |
| Compatibility | Magnetic track products are not automatically interchangeable across systems. | Check the track and fixture specifications for matching system type, voltage, contact arrangement, and mechanical fit. |
| Typical benefit | A reconfigurable lighting layout with a clean, continuous track appearance. | It can make it easier to change fixture positions or types than a layout where each light is permanently wired at a fixed point. |
Key Components of a Magnetic Track Lighting System
A magnetic track lighting system has four practical parts: the track, a power supply, magnetic adapters, and LED light modules. The track holds conductive strips beneath its surface. A driver converts mains electricity to low-voltage power, commonly 48 volts, for those strips. The adapter connects each light to the conductors and holds it in place magnetically. Click. The fitting can then slide along the rail or be repositioned without rewiring.
The light module shapes the beam. A narrow spotlight can highlight a shelf, while a linear module gives a desk more even illumination. Connectors join track sections; end caps cover exposed ends. Check that the driver, track, and fittings share the same voltage and system standard. Dimming also depends on compatible drivers and controls, not just the lamp. Small parts matter.
The U.S. Department of Energy’s 2022 U.S. Lighting Market Characterization estimated that LEDs represented about 48% of installed lighting in 2020. That figure describes adoption, not guaranteed savings from any track system. Savings depend on wattage, operating hours, aiming, and controls. A poorly aimed spotlight can waste light on a wall; a sleek rail cannot fix that. For a real installation, verify the driver’s load range and leave room for heat to escape. One detail is easy to miss: magnetic attachment does not always mean every fitting will work with every rail.
How Power and Magnetic Connections Work
Magnetic track lighting combines a power-carrying rail with fixtures that attach magnetically. Depending on the system, a driver converts mains electricity to low-voltage DC, commonly 24 or 48 volts. Conductive strips inside the track carry power; metal contacts on each fixture touch those strips when the fixture is seated. The magnets hold it in place, but they do not carry the electrical current. That distinction matters.
Connections need correct alignment and compatible voltage. A fixture may click into place yet fail to light if its contacts miss the conductors or its driver is mismatched. Some systems allow fixtures to slide or rotate while energized; follow the maker’s installation instructions and isolate power before servicing. IEC 60570 covers electrical track systems for luminaires, including key safety requirements. The magnetic part can look simple. The wiring is less forgiving.
Low-voltage operation does not automatically mean lower energy use; efficiency depends on the driver and light source. The U.S. Department of Energy reports that LEDs use at least 75% less energy and last up to 25 times longer than incandescent lighting (DOE, “LED Lighting”). That comparison concerns LED technology, not magnetic tracks themselves. It is an easy distinction to blur. A careful installation keeps the track level, contacts clean, and power supply within its rated load.
Common Track Layouts and Lighting Options
Magnetic track lighting can follow the shape of a room rather than forcing every fixture into a fixed row. A straight run works well over a kitchen island or hallway, where light needs to land along one clear line. L-shaped tracks turn around a corner and can connect work surfaces with nearby cabinets. For larger rooms, U-shaped or perimeter layouts spread light across several zones without filling the ceiling with separate fittings.
Plan the layout around what people actually do. A track above a desk may need a focused spotlight, while a living area often benefits from softer, wider beams. Small details matter. Adjustable spotlights can highlight a bookcase or dining table, and linear modules provide more even light along a counter. Pendant modules bring light closer to a table, but they need enough clearance for people walking underneath. Too many fixture types can make the ceiling feel busy; I would sketch their positions before choosing them.
The magnetic connection makes fixtures easier to reposition along compatible track, which is useful when furniture changes. Still, flexibility is not a substitute for planning. Check the room’s dimensions, ceiling height, and intended uses, and confirm that the track and fixtures are compatible. A layout that looks balanced on paper may cast shadows once cabinets or tall furniture enter the picture. That part is easy to overlook.
Typical Applications and Design Considerations
Magnetic track lighting uses a powered rail and detachable light modules. Magnets hold each module in place, while electrical contacts deliver power. A driver converts the supply to the system’s required voltage. Exact requirements vary, so check the product specifications before planning a layout.
It suits kitchens, galleries, retail spaces, and flexible home offices. In a kitchen, adjustable spotlights can brighten a worktop, while a softer pendant over an island adds contrast. In galleries, narrow beams can highlight artwork without lighting every wall equally. Useful flexibility. But moving a light does not guarantee good illumination; beam angle and distance still matter.
Plan track positions around furniture, ceiling structure, and daily movement. Place lights to reduce reflections on screens and glossy counters. Mix focused spots with wider ambient lighting to avoid harsh pools and dark gaps. It can feel clinical. Warm color temperatures may soften living areas, while accurate color rendering matters for artwork and clothing. Confirm the rail’s load capacity, dimmer compatibility, and mounting method. For mains connections or uncertain ceiling conditions, use a qualified electrician. One common oversight: leaving too little access to reposition modules later.
